


Before my grandparents moved to Mohali they were living in Jalandhar, a city in the northern indian state of Punjab. About ten minutes from our house in Jalandhar was this Gurudwara (the holy place where Sikhs worship) that my grandparents would go to regularly. Every afternoon, just a few feet away from the Gurudwara, a guy would come with his mobile cart and sell these amazingly thin, crispy yet soft Amritsari Kulchas. He would only come in the afternoon with the dough and filling prepared at home and would stuff and bake the kulchas in front of us, serving them in plates with his famous spicy chickpea curry. Our summer vacations were full of foodie adventures and my grandparents loved feeding us. These amritsari kulchas were a must on each of our visits.
Every afternoon, people would come during their lunch break and line up for a plate of this guy’s delicious Kulchas. He always came alone and stuffed the dough in front of you and baked it in his mobile tandoor to serve the dozens of people waiting next to his cart. Since he baked then and there, we would get piping hot kulchas laden with oodles of butter that would immediately start melting once placed on the kulcha. Not only were his kulchas to die for, but he made a delicious spicy chickpea curry and gave homemade pickle on the side. Eating them fresh out of his tandoor was the best option but generally we would get them packed for the whole family and eat at home. And stuff ourselves crazy. No wonder my brother and I would gain 5-6 kilos easily during the months of May and June.

Kulchas are Indian flat breads which are similar to naans but differ slightly in the way they are prepared. While naan is made using yeast, kulchas are leavened using baking soda/ baking powder. The shape also varies. Naans are oblong, and kulchas round. Other than that there isn’t much of a difference. Some point that naans are made in tandoor and kulchas are known to be made on stove tops, but I have seen both methods of cooking used for both these flatbreads. I have also seen naan being made without yeast, and have come to the conclusion that the difference is minimal and the nomenclature is more to do with tradition than anything else. If anybody has any other input I would love to know.
Amritsari Kulchas are stuffed variants of regular kulchas and are filled with potatoes, onions, indian cottage cheese (paneer) and certain spices. No one is clear about its origin but I assume since its named after Amritsar, a city in Punjab, home to the famous Golden Temple, its origin probably lie in one of the many streets that make the famous city. And its no surprise, the entire city has gazillions of eateries serving the city’s own Amritsari Kulcha.
Having tried Amritsari Kulchas at the best places in Amritsar, Jalandhar, Mohali, Chandigarh, Delhi I can safely say the ones made by my parents’ cook at Allahabad are as good as the ones I have had, if not better. I love how they just melt in the mouth.

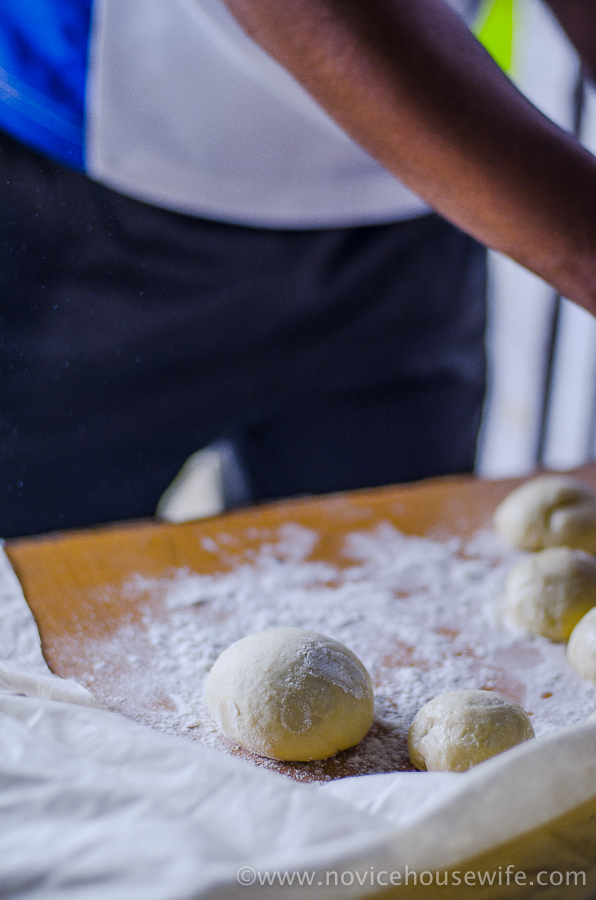
The two things that the cook told me to keep in mind to be successful at making kulchas is that one, the dough shouldn’t be too dry. It should be wet and still slightly sticky. One of the photographs below should give you an idea.
The other thing is the stuffing. You should only mix it just before you plan to stuff, else the mixture will leave water, making it difficult for you to roll out a nice round. While I have given a recipe for the stuffing, its very difficult to give you exact measurements, because these guys really don’t follow any measurements. When I made it too I did adjust a few ingredients here and there according to my taste. But the ingredient list should serve you as a basic guide and you can fine tune accordingly. I like a higher ratio of paneer to potato. While the cooks use 4-5 potatoes, I prefer just 2-3 and a higher ratio of paneer in the stuffing. But that’s a personal preference, so adjust accordingly.
Also, unlike most Kulcha recipes the cook here doesn’t use baking powder or soda and still achieves really soft and melt in your mouth kulchas.
While at my parents place we make the kulchas in a tandoor, I did not have that luxury when I made these in the states. Instead I have learnt a great trick from Journey Kitchen, on how to get tandoor style flat breads in a kitchen using the pressure cooker. I have explained the method in the recipe. For making the dough, filling and stuffing it, I have put together a step-by-step photo reference. Hope this helps in making the recipe more clear.

Make the dough and let it rest covered for 1-2 hours, while you make the stuffing.

Boil, peel, and mash the potatoes.


Grate the paneer in a separate plate

To the boiled potatoes, add onions, green chillies, ginger, carom and fenugreek seeds, and keep aside.

Fire up your tandoor


15 minutes before you are ready to make your kulchas, divide your dough into dough balls and let rest covered under a cloth. Also mix your filling at this point and add salt, to taste.


When ready to stuff, flatten each dough ball with your palm, and flip it between your palms as if you are clapping (as shown in the second picture below)


Take a sufficient amount of stuffing and put in the centre of your flattened dough ball.

Pinch ends together to make a ball, and flatten slightly. Oil your hands and flatten the ball to make a round shaped kulcha.


Bake in tandoor for 5 minutes, or till done.
You can also bake them or cook them in a pressure cooker.


Remove from tandoor and slather butter on them immediately. Serve hot with cholla /chickpea curry.


- 1 kg all purpose flour
- ⅓ cup yogurt
- 1 egg slightly beaten at room temp (if you do not eat egg, skip it and just adjust the liquid- I have successfully made this recipe without egg, just make sure you adjust the liquid- the dough should be a fairly wet yet smooth dough)
- ⅓ cup vegetable oil
- ¼ cup semolina flour (sooji) (this is added to make the kulcha a little crisp)
- 2 tsp salt
- 500 ml water (adjust accordingly)
- ½ tsp baking powder (optional)
- 400 gms paneer, grated (3 cups)
- 2-3 potatoes, boiled, peeled and mashed (see not above in post)
- ¼ cup coarsely ground cashews
- 1 tbsp saunf/ fennel seeds
- 1 tbsp ajjwain/ carom seeds
- 1 cup finely chopped onion
- 1 tbsp ginger
- 1 tbsp green chilli
- 2 tsp salt, or to taste
- ¼ cup finely chopped fresh cilantro/coriander leaves
- 1 tbsp kalonji/onion seeds
- Mix together the flours, salt, yogurt, egg, oil and knead together till it resembles coarse breadcrumbs.
- Add in the water, and mix the dough with your fingers. Knead till smooth. Keep the dough a little tight but wet.
- Use a little more oil between your hands to handle the dough without it sticking to your fingers. Keep covered for an hour or two.
- Boil the potatoes, peel and mash them and keep aside.
- Add in the seeds, onion, ginger, chillies, cashews.
- Grate the paneer in a separate plate.
- When ready to stuff, mix the potato mixture with paneer. Add in salt, chopped cilantro and onion seeds.
- Fifteen minutes before stuffing, oil your hands and divide the rested dough into dough balls. Keep covered under a clean towel, while you make the rest of the dough balls.
- Once rested for 15 minutes, flatten the dough ball, and stuff a sufficient amount of filling in the flattened dough. Pinch sides together to make a stuffed dough balls. Using a little oil/or flour, flatten the stuffed dough to make a thin round.
- Bake in tandoor for 5 minutes. Remove and top with butter and serve with chickpea curry, pickle and onions.
- Heat pressure cooker without the lid on or your skillet on high for 3 minutes.
- Remove the whistle from the lid. Put the stuffed flattened kulcha on the bottom of the cooker and tighten the lid. If using skillet, put flattened kulcha round on the skillet and cover with a lid.
- Remove the cooker lid, after a minute, reduce heat to medium high and flip the kulcha over and again cover with lid and cook for few more seconds till the bubbles start charring. I generally do this for a few seconds and then remove it from the cooker and then char the kulcha on open flame till I get the desired charred look. It just takes a few seconds.


OMG…I love that little tandoor made out of a canister 🙂 Loved the step by step
Tanvi@SinfullySpicy recently posted..Layered Mango & Raspberry Dessert
Isnt it brilliant!! I love it too!
Awesomely hungry! I love Punjabi food..
Nice shot that last one.
Girish & Deepa
http://www.foodlyrics.com
Girish recently posted..Sneak Peak | Viha and Shrijit | Pune wedding photography
I love Punjabi food too!! Thanks Girish!
Delicious delicious!!! Flat bread at its best!
indugetscooking recently posted..Shahi Paneer
Thanks Indu 🙂
Fun Post Shumalia. I love garam marsala Tuesdays! I have not seen a Tandoor like this before. However, it might be a tad more practical in the US to use a pressure cooker. Just wondering could I steam them and then cook them over the grill? Just shared!!
You could completely cook them on the grill also I think. If I dont feel like using the pressure cooker, the oven on the highest setting works as well, so does the stove top. Thanks for the share 🙂
Had a pleasurable, drooling and inspiring time reading your wonderful blog. I am a foodie myself, and enjoy trying various dishes from south to north. Thank you very much for providing clear tips and explaining through beautiful photographs.
appreciate.
Pattu recently posted..My fireflies
This is incredible!!! And that tandoor rocks! I love and adore every bits and pieces in this post. Happy to be here today 🙂
Radhika Vasanth recently posted..Homemade Blueberry Jam with a hint of chamomile
I had Amritsari Kulchas while visiting London and a friend of mine shared with me a similar recipe. After cooking them in a skillet I was quite dissapointed from the result, but next time I will try to make them following your instructions, definitely by covering the skillet with a lid on. Maybe this will make the difference…
Awesome looking Kulchas. Just a little correction needed in your ingredient list. Saunf is fennel seeds in English. Fenugreek seeds as you have mentioned are methi seeds.
Thanks for pointing it out!
this looks good..I would love to try the oven method..could you pls share how??
Hi Thank you. I cook on the stove top in the pressure cooker, but if I had to try in the oven then I would use a similar method I do for pizzas. Highest temperature your oven can go to with a preheated stone or baking tray inside. Slide the kulchas on the tray when the oven comes to the desired temperature. Flip after a few minutes to cook on other side. Remove.